Monday, February 3, 2020

Log Cabins Coming Out My Ears!

Until now, I have never made a quilt for my own bed.  I am finally attempting it!   So what did I pick?  A log cabin quilt.  It has always been on my bucket list of things to make and I'm finally doing it.  Unfortunately, that means I must make a king size version since we just purchased a king size bed this year.  YIKES! 

So here is my progress for far  . . .
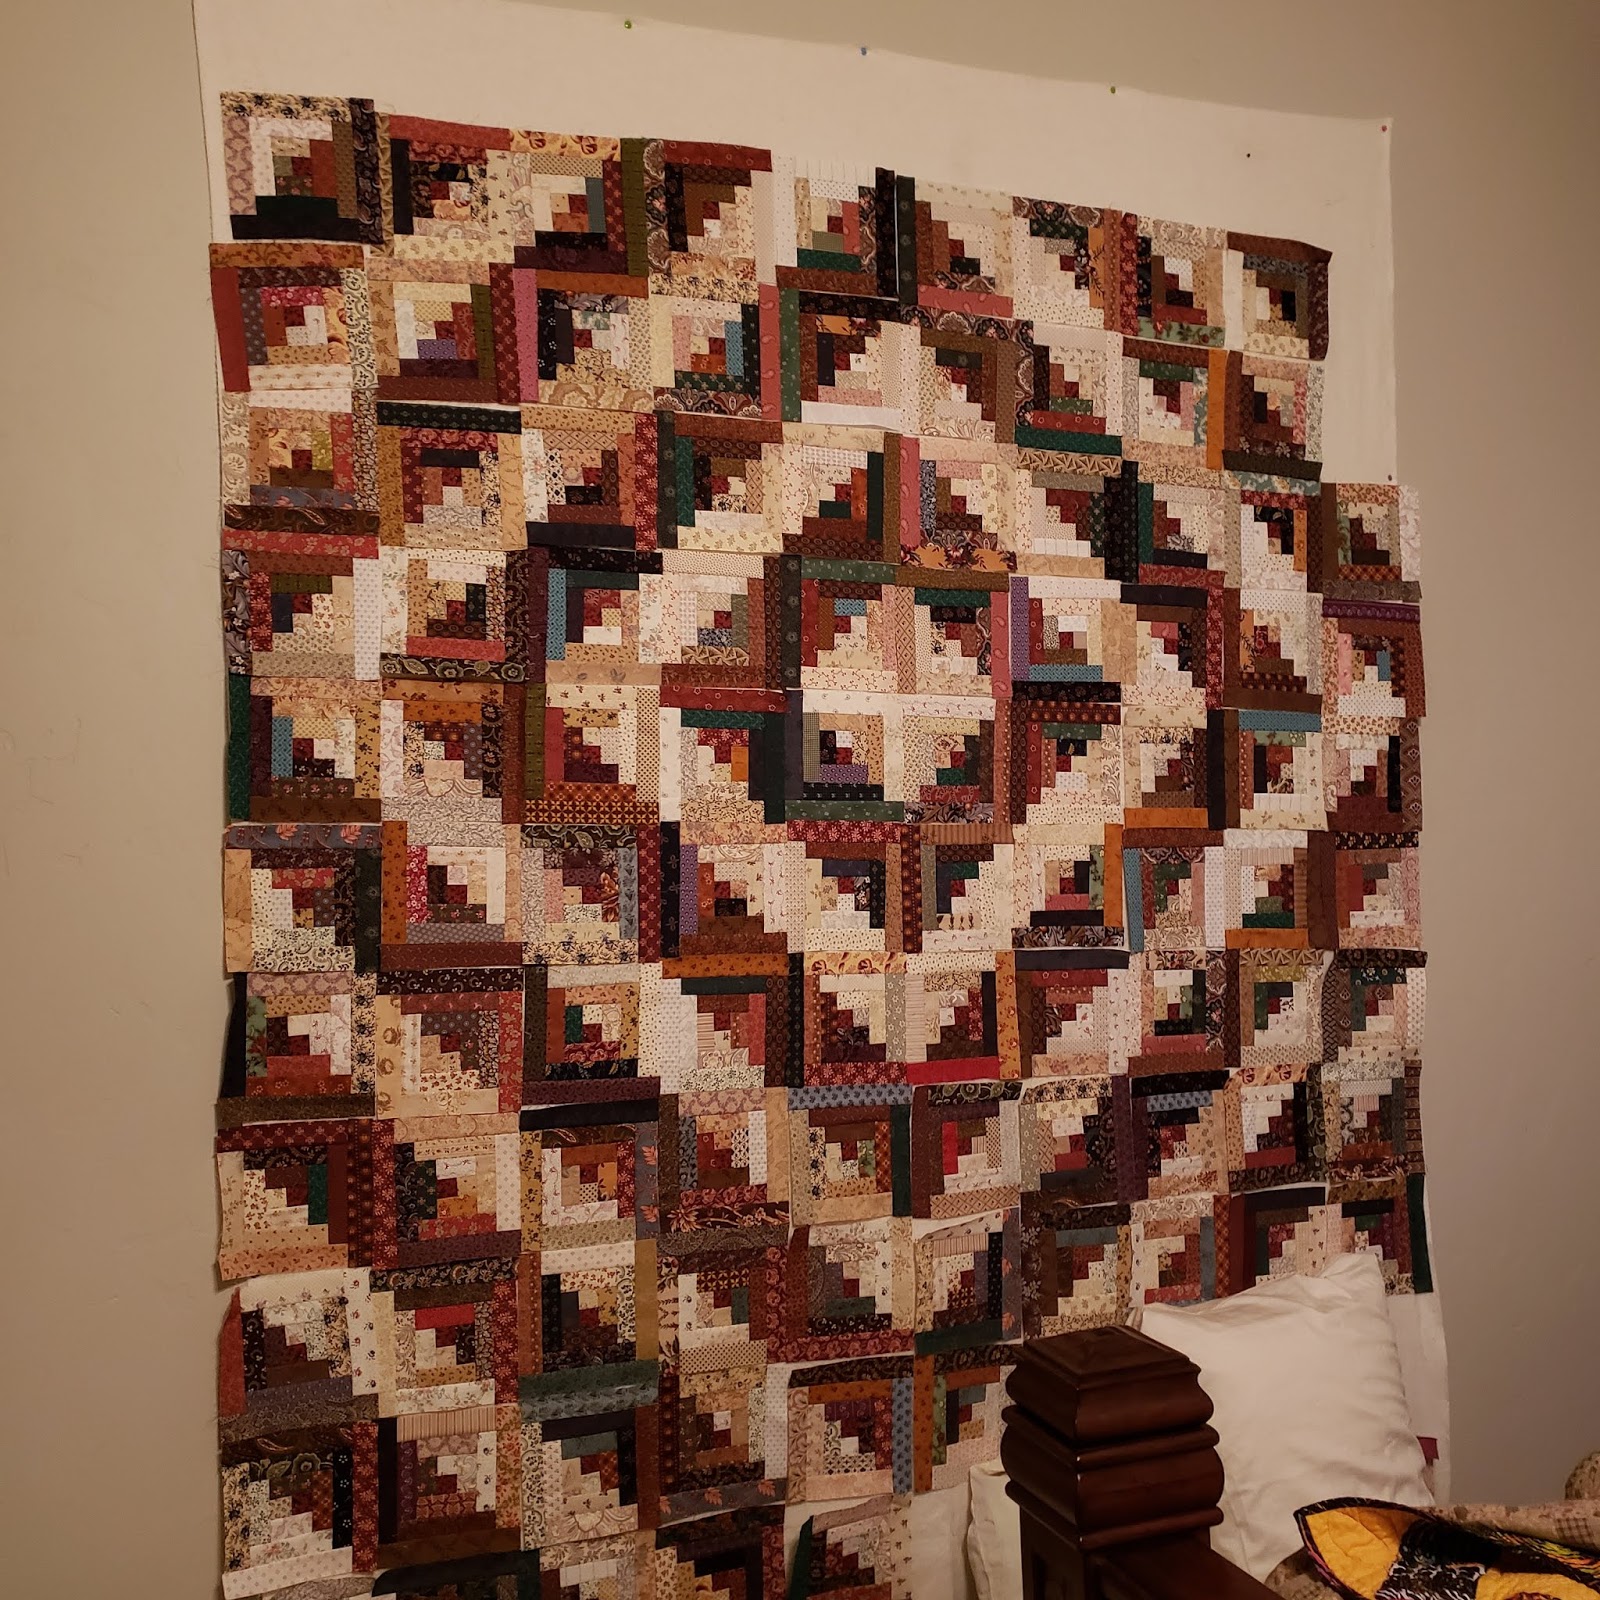
This is a twin size piece of batting on the wall and this particular picture shows progress up to a 10 x 11 layout.   I need a 14 x 15 layout so I am just accumulating the rest 10 blocks at a time until I have a total of 210.  I am actually up to 190!  20 to go! 

I am using mostly Civil War reproduction fabrics but there are also some other fabrics that aren't repro at all but I decided the colors worked so in they went.  Here are some closeups of a few blocks.


My daughter-in-law wanted a log cabin quilt too but she wanted hers done in more neutral colors like this . .  


So I had about 20 blocks made using that color way.  Then she saw my quilt and kind of changed her mind and wanted hers to be more like that.  So I took the neutral blocks I had made and just made a baby quilt with a definite Little House on the Prairie vibe to it. I put a brown paisley around the edge.


Looks pretty blah from a distance but up close the fabrics are fun to look at.  Well, I like looking at them anyway!  Ha! Ha!


I have a ton of brown reproduction fabrics so I decided to piece the back too!  So here's what I did with that. 

 A lot of work for one little baby quilt but I enjoyed it.  I know that I would LOVE to quilt it in the Baptist Fan design but I've never done that using FMQ before.  Any suggestions on how to go about it?

 Again, I know this is not something that is going to make everybody go "oooo! WOW!" but I just love it.  It feels so homemade and vintage.  Like I said, Little House on the Prairie.  All those rich chocolaty browns just seem so cozy to me.

I just changed the font on my blog to be more clear and a little bigger.  Goodness knows I am having trouble seeing as well as I used to so I figured if it's happening to me, it's probably happening to others too so I thought I'd help ya out a bit.  

OK so any advice on how to proceed quilting the Baptist Fan is greatly appreciated!


Linking to:


Tuesday, November 12, 2019

What's Cuter Than Little Girls at a Tea Party!

I blogged about a quilt I made for my grand daughter's birthday and am finally getting around to showing the big reveal!


My daughter-in-law Krystel threw a tea party birthday party for my oldest grand daughter's 5th birthday.   This party was magazine worthy!  Photography is by Krystel's sister Katie of Francelle's Photography)  Isn't this picture gorgeous??  (there are a few thrown in from my phone)


Here is great grandma, Aunt Ashley and grandma (me)

Here is the birthday girl and her 2 yr old sister to the right.  

Pouring her tea . . .


Spooning sugar is serious business!

Little sister thoroughly engrossed in her tea!

Ahhh!  So yummy.

Littlest sis spent most of the party like this . . .

And here she is later all refreshed!


Here is the birthday girl's sweet face after she opened my gift to her.  The quilt is wrapped around a matching pillow.  

Aww, she is hugging it!

When I unwrapped it and showed her what was on the back, I wish you could have heard her squealing about unicorns!  Priceless!  I am going to have to make my little sweetie a bigger one.  This one is more the size of a wall hanging!

But she loved it and that is all that matters.  💕


I have missed you all.  I've been missing from blogland for a few months and it's time to get back in the saddle!   Yes, I have probably lost my mind but I am working on two king size quilts at the same time.  I'll write about that next time!  

I would absolutely love to hear about your favorite quilt giving (or receiving) memory!  
I'd love it if you'd leave me a comment with your story.  💗  

Linking to:


Sunday, September 8, 2019

Birth of a Unicorn

This story begins with a gift of a charm pack of purple and green fabrics given to me by my daughter-in-law.  Little did I know what that would lead to!

I didn't really have a plan, other than to make something for my favorite purple lover.  She happens to be my granddaughter, Illaya.

I recently made this quilt for her sister BettyMae.  


I loved how that one turned out so much that I decided to try and make a purple version.  Well, that was the plan anyway!  I started turning those charm packs into 9 patches.  These squares are 2 1/2" inches unfinished.  I ended up with twelve of these.  All different.


So then I started searching for some nice purple border fabric to go with it. and found this pretty purple floral stripe fabric  by Maywood Studios.

If I was going to make a quilt like the other one, I still needed some small purple floral to go in between the 9 patches.  We (Illaya's mom and I) never did find something we just totally loved so I was getting tired of this project not going anywhere and decided I was going to cut apart the white floral strip and use it as sashing.  So this is what I did next . . .

It was meant to be!  
I only had about 6 inches of this white stripe left after adding the sashing.

Then I added the wide purple strip around the edges . . .

At this point, I realized that it would probably look a little strange if I added any more to it so decided to stop right there.  This is going to be a pretty small quilt.  Illaya isn't a baby anymore but she is still pretty young so a small size will still work.  At this point it measures 47 x 39.

Now . . . time to decide what goes on the back.  It does help to do the searching along with the mommy.  She spied this panel and said it was perfect as Illaya has a fondness for unicorns.  A very non-traditional choice for a quilt back but I'm going for it!  Oh the fun stories I can tell her inspired by this picture!  And it's got some lovely purples and lilacs and greens in it so will work very nicely as a back.  For not having a specific plan, things are working out pretty good so far!

 And the panel will fit on the back with just a little bit of border added to it.  Color works, size works, this is meant to be!


Now to figure out how to get it up to size.  I was thrilled to find two fat quarters in my own Etsy store!  (I recently bought somebody else's destash for resale but will probably end up using them myself!)  These two fabrics have the most beautiful blues and must have come from the same design line as they both have shiny gold accents in them.


I cut them both into 2 1/2" strips and sewed the strips together to border the unicorn panel.   It's almost like they were meant to be together!  And yet another sign this was meant to be.  The strips were the perfect length to fit two on each side with just a tiny bit to spare.


Don't you just love it when things fall together so perfectly??


  I ended up with enough border fabric to wrap a around a nine patch block to make a little matching pillow.  Now I just need to find some binding fabric and probably use the same fabric for the back of the pillow.  


Illaya's birthday is in October so I've got a few weeks to get this quilted and finish the pillow.  Hopefully, the next time you see this quilt it will be wrapped around a smiling little girl!  My this has been the most satisfying project!


Linking to:

Sunday, August 25, 2019

Tips for a Great Half Square Triangle (HST) Quilt!


Isn't this GREAT???   My sister, Carla, sewed all these blocks while I did most of the grunt work of trimming and pressing.  This all took place at a sister's quilt retreat (just my sis and me) in the mountains of northern Idaho.  It was such a WONDERFUL time.  We got up whenever we felt like it, got dressed whenever we felt like it, (or not) and left the house whenever we felt like it.  Here is one of our little side trips . . .


Beautiful scenery . . .

Amazing antiques . . .

Cute outdoor eating places, 
this one for breakfast and a great little Italian place for dinner!


But MOSTLY lots and lots of sewing!

Yes, I did work on my own project as well but I couldn't stay focused on it.  I was working on adding solids to my crumb blocks that I made with vintage fabrics.  Here is how far I got on that.  What I really wanted to do was see how far we could get with Carla's quilt!

By the end of our stay, we had sewn and placed all  360 blocks and she got 1/2 the rows sewn to each other.  10 to go!  I have some tips about making one of these that we learned along the way. 

FIRST tip is definitely do not  make your HST's (half square triangles) one at a time.  Use a tutorial that allows you to create 8 HST's at once.  Carla's squares measure 5 inches trimmed and using the 8 at a time method, you start with 11 inch squares to make the 8 HST's.

These are the two reasons why I say use the 8 at a time method.

1.   It takes forever making HST's one at a time!  This will cut down your block making time.
2.   Making them in groups of 8 helps out in the design layout immensely.  I'll explain that in a bit.

I wrote a tutorial on the 8 at a time method here.  I included the math on how to figure out different sizes.  It has saved me oodles of time.  Note:  After you do the math to figure what size squares to start with, you may find that you can reduce the size a little bit to prevent waste from the trimming.  But it's definitely better to have HST's slightly too big and trim than not big enough.

TIP #2  Even colors that you normally wouldn't put together will look great in a quilt like this as long as you make sure the HST's are high contrast.   Here is a perfect example.  I think the pink floral is cute but the combo with this weird checker zig zag is icky to my eyes.   In this case, the colors don't matter so much as the fact that they are definitely high contrast of dark and light.  When you step back and look at the entire quilt, you no longer see the individual fabrics but rather the pattern created by the arrangement of the darks and lights.


Can you see the ugly blocks?  If you look hard you can find them, but they don't stick out like you think they might.


TIP #3  If you make your HST's in groups of four or eight, start in the middle and design your way outward.  You can create just a little bit of order in the what appears to be a chaos by putting the same squares in each quarter of the quilt.  In fact, in a few cases, we deliberately used the same dark fabric paired with various lights to create a definite line.  You can see this with the 12 black background floral triangles near the middle and again with those same black background HST's a little further out ward with four of each on each side of the design.   There was a lot more thought that went into the layout of this quilt than it seems.  I know it looks random, but it isn't.  If you study it, you can begin to see what decisions were made.  Each quarter of the quilt are repeats of the other quarters or as close as we could get.  So that is why it helps to make your HST's in groups of four or eight.

Hope my tips gave you something to consider and maybe you'll try your own HST quilt someday!


Linking to: