Thursday, September 22, 2016

2016 Bloggers Quilt Festival

What a fun thing Amy Ellis has put together!  Seeing everybody's favorite creations all at one time will be a most enjoyable blog reading experience!  Click on this  Bloggers Quilt Festival link to see the beauty!  I am going to enter because even though I'm a newbie and hardly made anything at all this year, there are still some random drawings for all participants so I'm going for it.  (too bad there isn't a category for newbies).

You can see my original post about this quilt here.

My entry was inspired by a pattern I liked in the 2013 May/June issue of Fons & Porter.  It is a pattern designed by  Kimberly Jolly called Strawberry Skies. 

Here are the fabrics I chose to use . . . 


And here is my miniature version of this design . . .


I forgot to take a picture of the back but it is a super soft minky-like fabric that just begs to be petted.  The end of this story is I made this quilt for my niece who was supposed to be having a girl but she came out a Calvin!   

Hope you all enjoy the Quilt Festival!  Please be sure to vote for your favorites in each category.  There are some gorgeous and very creative designs!

Blessed quilting!


Thursday, September 15, 2016

Three Quilty Things!

Even though I haven't done a lot of sewing myself this week, I do have three quilt related things to talk about.

1.  EBAY!!  I love shopping on ebay for fabric so if you are an ebay seller who frequently sells fabric, please send me your seller name!  I am going to create a tab on my blog with a list of these.  Who better to support than fellow quilters!


2.  QUILT SHOW AND TELL (sort of)!!  So here is what I spent my Sunday doing.  At our church (in a small rural Idaho town) we have an annual event that we put on for the community called Family Fair and Roundup.  There are people who wouldn't ever step foot in a church but they would come to a fair and rodeo!  It starts off with a church service with good country gospel music in the rodeo arena, a sermon by our pastor and then the stage is disassembled and we have a real live rodeo with prizes and everything for the cowboys and cowgirls (barrel racing!).  There are food booths, and a huge dessert booth with all kinds of homemade pie and cobbler and soft ice cream.  There are games for the kids and we had a gentleman do a leather embossing craft with the kids.   And last but not least, a quilt show!   We try to get at least 25-30 quilts to show and this year we had 45!   All of these quilts are made by either someone in the church or by someone we know.   I'm bummed that I didn't get more pictures of them.  What was I thinking???   Next year I'll do better.  This is the third year we organized a quilt show.


I failed to get a picture of the entire quilt but I hope you enjoy these closeups of some of this VERY vintage fabric!


3.  GIVEAWAY PRIZES!!

Now to announce the prize winners of the Shadow Block Mini Blog Hop!

The winners were the two blog participants whose birthdays were closest to mine and Jen Rosin.  

My birthday was September 11 and the closest to that is Amanda Forest at Quiltologie (hers is later this month)  

Jen's birthday is in April and Jennifer Fulton of Inquiring Quilter was the only other April birthday.

The winner of the squares provided by Jennifer Strauser of Dizzy Quilter 
is Marlene Scobbie at Black Cat Quilting

Jen offered a prize for anyone who left a comment on all of the blogs in the blog hop and there were only four commenters who accomplished that.  I created the list and told Jen to pick a number between 1 and 4.  She picked #1 who happened to be Yvonne Fuchs of Quilting Jetgirl!  Yvonne is a great commenter too.  She comments a lot on the same blogs I do and you can tell she has read every word and strives to leave relevant and thoughtful comments.

And last but not least, was a prize for anyone who left a comment on any of the participating bloggers.  There were 320 comments left.  Great traffic ladies!
  
The Random Generator picked Katie at Life in Pieces.  I have e-mailed you.

Quilty blessings!


Sunday, September 11, 2016

2016 Cloud9 New Block Blog Hop

Welcome!  This has been a year of a lot of firsts for me!  The latest "first" is designing a block for this blog hop.  


First of all, thank you Cloud9 for providing the beautiful fabric for this blog hop and to Yvonne Fuchs at Quilting Jetgirl, Stephanie Naso Palmer of Late Night Quilter and Cheryl Kaminsky Brickey of Meadow Mist Designs for organizing it.  I am so looking forward to seeing everybody's creations!

Kudos to all those who design patterns for a living, as this was WAAAAY harder than I thought it would be.  I seem to have a fascination with 3-D looking things.   My two most visited posts on my blog (Pretzel Twist and Shadow Block Mini Blog Hop)  are both about quilts that have that three dimensional look to them.  In fact, this block is a modified version of the Pretzel Twist.  Just a little more 3-D.  I searched for a similar block design but didn't find one.  If this already exists, please let me know.  Without further ado, may I present . . .

SQUARE CHAIN LINKS

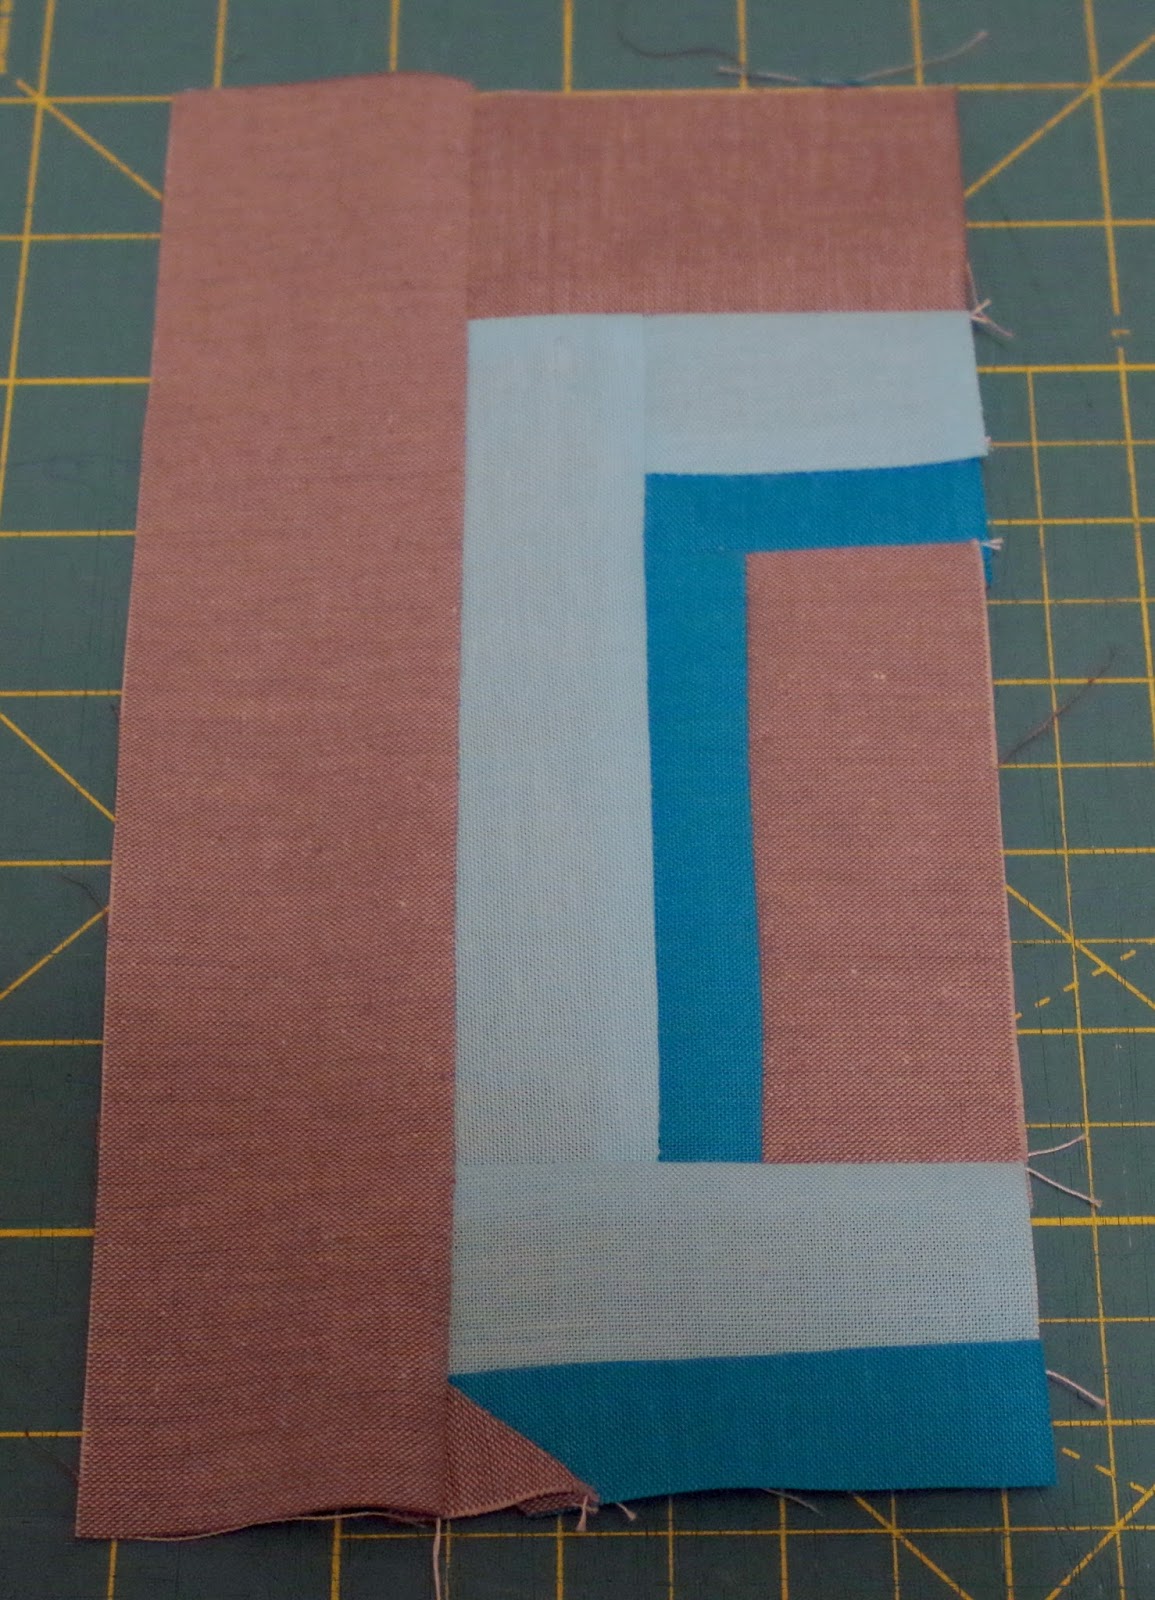
Here is my practice block . . .

Here is the test block which an unsuspecting friend (thank you Leanne) graciously agreed to sew  using my tutorial with nothing but the instructions (no pictures).  Here is her version . . .


And here is the final version using the beautiful Cloud9 fabrics.  When I first saw this color palette, they immediately made me think of shadows.

Right off the bat I will say I picked too hard a design for my skill level.  I am still not very good at consistent 1/4" seams yet so matching seams was a problem for me as you can see.  Even after practicing once, I still didn't quite get it right.  

As I was making my final block, disaster struck!  I had taken pictures of the process and halfway through ended up having to change memory cards as the one I was using locked up on me.  I thought I could still retrieve the pictures, but now I can't even find the card I was using!  Grrr.   I only have pictures for the last few steps of the block and the final finished product.  I will keep looking for my card so I can insert the pictures later.  UPDATE:  I did find my card; however, whatever caused it to lock up also prevented any saving of pictures so I lost all the pictures I took during the sewing of my block.  Boo.  :(

If you like this block at all, hopefully the diagram I have provided and the written instructions will be enough to complete it.  My apologies!   If you have the diagram to look at as you're following the instructions, it should be fairly easy to follow along.

I highly recommend pinning a label (1A, 1B, 1C, etc) to the pieces you cut as shown in the diagram below as this will help you later in locating which piece gets sewn to which without having to measure them every time!  You will need 28 labels.  Here are the labels you will need if you don’t already have a labeling system.


1A
1B
1C
1D
1E
1F
1G
1H
2A
2B
2C
2D
2E
3A
3B
3C
3D
4A
4B
4C
4D
4E
4F
5A
5B
5C
5D
5E


Fabric Needed--A fat quarter of each is more than sufficient and even a fat eighth of each would work.

Background (or fabric #1)
Cut two 2” strips the length of the FQ and then subcut into
1B, 1C and 1D

Cut 1 ½” strip the length of FQ and subcut into 1E, 1F and 1G

4” x 1”  (1H)
9” x 4 ½” ( 1A)

1A   4 ½” x 4 ½”  (cut two)
1B   8 ½” x 2” (cut two)
1C   4 ½” x 2” (cut two)
1D   3” x 2” (cut two)
1E   4” x 1 ½” (cut two)
1F   3” x 1 ½” (cut two)
1G  1 ½” x 1 ½” (cut one)
1H  1” x 1”  (cut four)
Dark Blue (or fabric #2)
From a 1” strip at least 21 ½” cut the following

2A  2” x 1”  (cut two)
2B  4 ” x 1 ”
2C  3” x 1” (cut two)
2D  5 ½” x 1”
2E  2 ½” x 1”

  
Light Blue or Fabric #3
From a 1 ½” strip at least 21” cut the following

3A  2” x 1 ½”
3B   5 ½” x 1 ½” (cut two)
3C   3” x 1 ½” (cut two)
3D   2 ½” x 1 ½”

Dark Pink (or Fabric #4)
From 1” strips totaling at least 23” and sub cut the following

4A  2” x 1”
4B  3” x 1”
4C  1 ½” x 1 (cut two)
4D  4 ½” x 1”
4E   6 1/2” x 1 ”
4F  3” x 1”
Light Pink (or Fabric #5)
Cut a 1 ½” strip at least 22” and then subcut into the following:

5A   2 x 1 ½”
5B   3 x 1 ½” (cut two)
5C   4 ½” x 1 ½”
5D   2 ½” x 1 ½”  (cut two)
5E   4 ½” x 1 ½”


Follow pressing instructions for best results but if no pressing instructions are given, it is your preference.

To get the teeny tiny difficult pieces out of the way first, take the four 1H’s and pin  them right sides together to one end of each of the following:   4E, 4D, one of the 2C’s, and 2D as shown

On  2D and 4E, sew diagonally across 1H from top left corner to bottom right corner

On  2C and 4D, sew diagonally across 1H from top right corner to bottom left corner

When you sewed the diagonal line on 1H it created a triangle flap.  Flip up and press.  Trim off excess triangles on the back

Put those four items with the small triangles attached (4E, 4D, 2C, 2D) back with their labels.

Sew the long side of 4C to the end of 1E, press to dark side.

With 4C at the top, sew 5E on the right side of the two you just sewed together

Sew one 5D onto each end 

Sew 4E  to the right side of 5E

Sew 4F to the end of 5D as shown, press toward 4F

Sew 1D to 4F, press toward 1D

Sew 1B to the right side of entire unit as shown

Sew 1A to top of unit as shown

You'res 1/3 done!

Section 2 (Middle Section)
Sew one of the 4C’s to 1G
With 4D on the top, now sew 4A to the left of that unit and press away from 4A

Sew 5A to the top of that unit

Sew 5B to the left of that unit and press away from 5B

Sew 1F to the top of that unit

Add 2C to the top of that unit (press toward 2C)

Add 3C to the top of that unit (press toward 2C)

Sew 3B to the right of that unit

Sew 2D to the right of 3B and press toward 3B

Sew 1C to the top of entire unit and press toward 1C

Set that unit aside

Sew 3D to the top of 2E

Sew 2A to the right side of that unit and press toward 2A

Sew 1F to the bottom of that unit


Sew 4B to the left of that unit and press toward 4B


Sew 5B to 4B and press toward 5B


Sew 5C to the bottom of that unit and press away from 5C


Sew 4D to the bottom of 5C and press toward 4D


Sew 1C to 4D and press toward 4D


Now sew this unit to the bottom of the previous unit we set aside

Section 3

Sew 2B to the left side of 1E

Sew 2A to top of that unit making sure 2B is on the left, press away from 2A


Sew 3A to 2A, open and press away from 3A

Sew 3B to the left side of unit which should be touching 2B, 2A and 3A


Sew 1D to the top of the unit, press away from 1D

Sew 3C to the bottom of the unit

Sew 2C to the bottom of 3C

Sew 1B to the left side of the unit


Sew 1A to the bottom of the unit

Sew Section 1 to the right side of Section 2


Sew Section 3 to the left side of Section 2


We’re through!  You should have a 12 ½” block (that will finish as 12”) .

My assessment of my own design?  Although it is interesting to look at, I would not want to make a whole quilt of this block; although if you like modern, I think it makes a great mini quilt or a one block baby quilt!  I will have to see if I can make an enlarged version for a baby quilt.  That would be much easier to put together.

Please take the time to visit the other block designers on this blog hop.  All of these blocks are going to be sewn together by Cheryl to make a quilt or two for charity.  I'm looking forward to seeing all of them together!

Monday, September 12th

Host: Yvonne @Quilting Jetgirl
Visit Yvonne for a chance to win some Cirrus solids!

Tuesday, September 13th

Host: Cheryl @Meadow Mist Designs

Wednesday, September 14th

Host: Stephanie @Late Night Quilter


Friday, September 9, 2016

Giveaway Challenge (Bribe)

I am constantly in awe of the amazing creativity I see every day.  I could easily spend a day just reading quilting blogs.  So inspiring!

I am hoping that this request I am about to make will appeal to your designing instincts and you can't resist picking up a pencil and paper and doodling something.  Or even if you don't doodle, an idea flashes through your brain that you would be willing to share.  For some incentive, I will be giving away this!  Ten fat quarters of yummy fabric in red, black, white, and gray.   Curious???


OK, here is the challenge . . .

My husband is a residential home builder.  Up to now, he hasn't advertised or marketed his business at all.  All clients have come by referral or by seeing other things he has built.   Well, we know we really should get some signs and things created but at this point, we don't even have a logo.  So here is the challenge. Helping us think of a good logo!  I'll give you some guidelines.

The name of his business is Liberty Enterprises, Inc.  He wants to include an "L" and an "E" either alone or with a simple symbol of some sort, something really simple and recognizable.  Just to give you an idea of my husband's sense of humor, here is what he wants his slogan to be.  "If Patrick Henry were alive, he would choose Liberty!"  I love it!

He doesn't want anything overtly patriotic (no flags and stars).  Something using the colors in the fabrics shown above would be great.  Red, white, and black with gray being optional.

Does this challenge spark any of your imaginations? I hope so!  A designer, I am not!   Surely ten free fat quarters of fabric tempts you a little bit?  Feel free to send multiple entries!  I know you can't include sketches in comments so feel free to e-mail me at janice(at)passionforperfume.com    I think it would be really fun to share any ideas I receive in a blog post and happily include links to the blog of anybody who takes a shot at this.  Please take pity on us design challenged folks.

I am hoping there will be an idea thrown out there that really strikes my hubby's fancy, but if not, then I will still draw a random winner from all the ideas submitted.  OK, ready, set, brainstorm!!

Happy creating!


Monday, September 5, 2016

Shadow Block Mini Reveal (My First Mini Quilt)

The day has finally arrived!!  Reveal Day for the Shadow Block Mini!  Yahoo!  I can hardly wait to see the variety of versions everyone came up with.  Here is my story of how all this came about.

I have been wanting to make a mini quilt for quite a long time  and as fate would have it, my fellow New Quilt Blogger Jen Rosin of A Dream and a Stitch was thinking along the same lines.  And even more coincidental, we were both attracted to the same mini!  So we decided to make it and blog about it together and invite other quilters in on the fun as well.  Although I really wanted to (because I'm naturally curious), I did not ask her anything about her plan, what colors she was going to use, or how she was going to quilt it.  I wanted to see what different kinds of ideas we would come up with using the same pattern.

The pattern we used comes from Debora at Studio Dragonfly.  Thanks, Debora!  She is joining in with the rest of us and making a new version of this pattern,


Since I am such a lover of lots of color, I chose to do my mini quilt with a sunshiny yellow background and the squares in a variety of colors.  I call this quilt Rainbow Crumbs.  It was so fun to chain piece all those tiny little squares and rectangles.  It goes very quickly. 


My mind sometimes takes weird turns and I thought wouldn't those pretty yellow bits look nice against my blue top?  Blue and yellow are a good combo, right????


Umm . . . no.  A jewelry designer I am NOT!  Stick to sewing, girl.

As I was sewing this project, I learned something important.  The directions usually say what they say for a reason and sometimes you can fudge them and sometimes not.  My first mistake came when I didn't read this line carefully:  

"Each row of five blocks will need four 1 1/2" x 3 1/2" background rectangles sewn between."
:  
I sewed the shadows on the wrong side so they were facing the four block rows instead of the five block rows.   I sewed them on the right hand side of each block and they should have been sewn on the bottom shadow side.  This forced me to put the long sashing strips horizontally instead of vertically like the directions said.  I thought oh, well, it will still work out.  Well, kinda, sort of.

Now, the left hand side looks like this with no sashing

And the right hand side looks like this with pieced "sashing".   :(  


From a distance it probably won't matter that much once I sew a strip on the left, but it would have been so much better to have both sides and the top and the bottom all looking the same with a sashing strip.   Pooey!  Oh well, I'm going to keep going.  It would be waaay to much trouble to rip everything out.

Now for the back. I'm not really wanting to use a large piece from my stash so decided to just improv piece the back of it from my scraps.  I figured if it didn't turn out well, nobody is going to see the back anyway.  So I grabbed this stack of scraps . . .

and made this for the back .


Now for the quilting!

As Debora wanted to do in her tutorial, I wanted the blocks of color to stand out so I quilted the shadows first in a snakey line.  I'm pretty sure this has an official name, but I can't remember what it is.  Candy something.


Then, because I has having so much fun quilting, I proceeded to quilt the snot out of the rest of it!  I mean, I really got carried away. 


So much so that I forgot to check out was happening on the back side.  Oh no!!  The batting got folded over and sewed into some of the quilting.  Lesson number two learned.  Keep an eye on both sides!

This was not going well.  If I was more professional than I am, I probably would have ripped this out and requilted that area, but I didn't. Quilt police, please forgive me!  I decided to leave it and see how much of that would be trimmed off when it was trimmed and bound.  It almost, but not quite disappeared.  I could probably try to pick out that batting of the bit that still shows one of these days, but I decided since it's hanging on the wall, probably nobody will ever see that.

So here is the finished Rainbow Crumbs!  I quilted it so densely that it stands up on its own!  This picture is my mini just leaning against the wall so the edges look a little wavy since it isn't just hanging straight.   

Here is a closeup of the quilting.  If you will notice, the squares that I wanted to emphasize all ended up rather wrinkly.  I learned what stabilizing means and this is what happens when you don't!  I didn't have enough basting pins in there before I started.  Another lesson learned.

This quilt was full of learning experiences for me.

I was so excited to get done that I made ANOTHER goof!  I machine sewed the binding on the back side instead of the front so the hand sewing appears on the front.  Oh brother.   

Well, regardless it is my lifetime fourth finish and  I am learning a lot this way without totally goofing up a large quilt.  I think I'll do some more minis!  

Oh!  One other thing I learned is that if you are doing dense quilting, it is probably best to outline the objects that you are quilting so it looks  more organized on the back.  I knew the back really didn't matter for this project, but it will on future ones.  Even though the back is rather busy on this one because of the improv piecing I did, I still kind of like the way the quilting looks, but it would be better with the sashing  outlined.  Don't you think?

Please be sure to visit the rest of the ladies on today's Reveal Day for this Shadow Block mini blog hop.  We are giving prizes to two of the bloggers who participated and also THREE prizes to randomly selected visitors who comment on any of the ladies in the blog hop.  

Prizes will be:

Jennifer Strauser of Dizzy Quilters  will be providing a set of blue batik squares to do your own shadow block mini

Jen Rosin  of A Dream and a Stitch will have a surprise prize.  I haven't seen it yet but she described it and I would love to win it myself!  You can win this prize by leaving comments on all the blogs in the blog hop.

I will be providing 3 fat quarters to a random winner who leaves a comment on any blog in the hop.

Please be sure to visit  the following ladies to see their versions of the Shadow Block Mini!   I will be creating a tab on my blog with a gallery of the all the Shadow Block minis once this blog hop is over so if you would like to be included in that gallery, just send me your Shadow Bock mini pictures.  And now on with the show .  .  .  !

Jen Rosin at A Dream and a Stitch
Debora Exum at Studio Dragonfly
Amanda Everest at Quiltologie
Susan Arnold at Quilt Fabrication
Bonnie Stapleton at Institches with Bonnie
Jennifer Fulton at Inquiring Quilter
Jennifer Strauser at Dizzy Quilter
Joanne Harris at Quilts by Joanne
Anja Clyke at Anja Quilts
Mary Schuberg at Needled Mom

I will be linking up with:

Sunday Stitching at The Creative Side
Main Crush Monday at Cooking Up Quilts
Monday Making at Love Laugh Quilt
Fiber Tuesday and Busy Hands Quilts


I'm so glad you stopped by!  Please do come again and follow along on my quilting journey!