
I'm going to show you an easy way to fix this! Bernie Kringel at Needle and Foot is graciously allowing me to use her picture as an example. Here is her picture in its original state:

And here is the picture with the colors corrected!

Much better! It would be a shame not to be able to see this beautiful quilt in its true colors!
Ready to learn? Here we go . . .
There are multiple ways to do this because there are many programs out there that can adjust colors but for this tutorial, I am going to use PicMonkey.com 's picture editing feature. It is a free site but you will need to create an account to use this program. There are certain features that will require you to subscribe and the site presents a 7 day free trial if you try those features, but the Picture Editing portion is free. Once you have created your account and logged in, here is what you see at the top of the page :

Click on "Edit" and you will now see this:
Click on "Open" and navigate to the place where the picture that needs editing is stored. It will give you options to go to your computer, Facebook, Flickr, etc
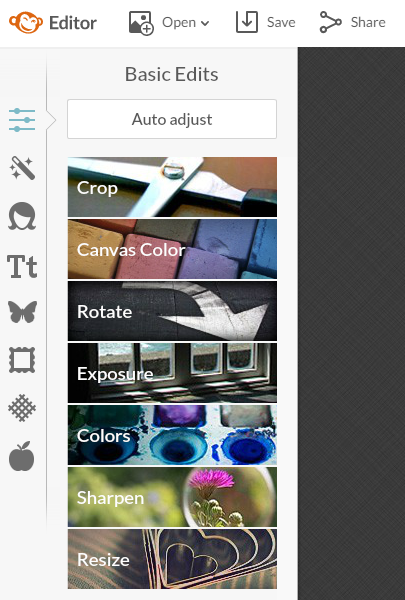
Once you have selected the picture you want to edit, your screen should look like this with your picture showing in the black field to the right of the Basic Edits menu:

Now click on the option that says "Colors" and this is what should appear.

There are two ways to go about this. You can either just click on the box that says Auto Adjust OR you can click on the box with the Neutral picker for a more accurate adjustment. Once you click on the Neutral picker, go hover over the picture you want to edit and you will see a little dropper looking cursor appear. Click the dropper on an area of your photo that should be either white or gray and the adjustment will be made for you. You should now see your adjusted picture like this!

All that is left to do is click on "Save" up at the top left of the screen and save it on your computer wherever you like. If you are ready to edit another picture, just click on "Open" again and you will see this message:

Just click on "open new image"and start all over.
I hope this tutorial has been helpful!
If you have any questions at all, please leave them in the comments and I'll respond asap.
If anyone can suggest a good linky party for this tutorial, I would love to know. Most of the party's I've linked to want your post to be about a finish or a work in progress so I'm not sure this would really fit that.
Thanks so much for stopping by!

Janice,
ReplyDeleteFirst of all, thank you for getting together with me and talking about the pictures. I have had so many issues with indoor photos and it has been a source of frustration. Such an easy solution existed and I had no idea! Also, thank you for the tutorial. It is such a breeze. At first I thought I had to pay for the service but I was able to get around that with a few clicks. I just fixed a photo and it was so simple. I am going to go through some others to fix and then update posts.
I cannot tell you how great this is!!
You can post tutorials over at Stephanie's site, Late Night Quilter. It isn't really a link up but she does have an ongoing collection of tips and tutorials and I bet this would be so helpful to others.
You made my day!!!
Yay!! I am so glad! It was my pleasure to do it. :)
DeleteI checked out the site since I want to make my photos look their best but the site states you can only have a free trial of 7 days. Please link me to the freebie site.
DeleteYeah, that's the tricky part The site is always free UNLESS you want to use one of their special fonts or a feature that is considered an upgrade; however, the basic editing features are always free to use at any time. Let me know what you were doing when you ran into the 7 day free trial.
DeleteJanice, your tutorial was well written and easy to understand. It's amazing what a little photo editing can do!
ReplyDeleteHow did I miss this post? Love your tutorial Janice, I hope it is also on your tutorials page because I am definitely coming back to review it. I haven't managed to work out how PicMonkey works, this will be a great help.
ReplyDeleteSmiles
Kate