Sunday, April 28, 2019

Knocking Out UFO's & Other Fun Stuff

I am making a conscious effort to finish up some old projects hanging around and actually got one of those UFO's to a finished top yesterday!  (for those not familiar with quilt lingo, UFO means Unfinished Object).

The last time I worked on this particular project was November 26, 2016.  My sewing room was in the basement of a little farm house we had remodeled from the framing studs out.  I loved that little house.

And here is the finished flimsy!  It was made with 2 charm packs and 2 mini charm packs, plus the sashing.   It would probably look better with some additional borders but I am leaning more towards just getting it finished and calling it good.  This picture is kind a boring as it doesn't allow you to see all the fun fabrics.

The sashing does a good job of imitating embossed leather.


Since there are quite a few farms and ranches where I live, 
it seemed like a good choice for a good boy quilt. 


On another topic, I recently joined a quilt swap.  The only rules were 24" x 24" or smaller. (It doesn't have to be square), Civil War reproductions, a label, with a deadline of mailing by April 30th. 

I received a wonderful Trip Around the World quilt from Robin Boggan and a beautiful little pin cushion which I have already put to use as I finished up my cowboy quilt.  I love this little quilt and will hang it in my sewing room.  Even love the fabric on the back.  :)  I love that old-fashioned look!


Back side


I think I already showed this once, but here is the quilt that I made and sent out this week.  I don't think my swap partner has received it yet.


I also received two wonderful house blocks from quilting friends of mine to help me get closer to finishing my house quilt!  The picture I took doesn't do Ann's purple block justice.  It is much richer and vibrant than this picture shows.


This one is from Velda at the Freckled Fox Quiltery.  
I just love those dapper foxes filling the front door!


I need two more to finish my quilt.  One will be coming from Jennifer and I made one more today.   After I loaded this picture into the blog post, I realized I didn't like it!  I don't like the dark border around the star so I went searching the stash for something different.


Hmm!  Better, but I'm still not sure I like it.  Before it was too dark and now too light.  
Unfortunately, I don't have a lot of pink in my stash so this is going to have to do.


I think in the overall scheme of the whole quilt, it will fit in ok.


I don't have room on my design wall to add one more row. 
I'm probably going to be rearranging the order anyway as soon as I get that last block.


I'm just about ready to put this baby together!  Each block is 16.5 inches so it will measure 66 x 82.5  My friend Jessie is not a fan of less than bed size quilts and she thinks I should put one more row down the side!  Yikes!  Do I have five more houses in me?  I just might.

Oh, speaking of Jessie.  She is working on a fun method of making denim quilts which is a quilt as you go method.  I have GOT to try this!


Here's what the back looks like.  Isn't that cool?  
After you sew all the rows on, you're done!  The batting is already inside!


I have not been making very good progress on my Block of the Month project.  Do you remember me saying I have fallen in love with Civil War Reproduction fabrics?  I started making a second version using those fabrics.  Yes, I know, I'm CRAZY!!  Modern fabrics and colors seem to be the popular trend in quilts these days but I am drawn to these old fashioned looking fabrics and colors.


I haven't sewn the roofs on yet.  I was debating on whether to give them all the same roof or keep it scrappy with a variety of colors.  I cut out these but am leaning toward scrappy.  

I am so indecisive!!

 Which do you think would look nicer?
Linking to:


Monday, April 22, 2019

Be a Diamond Blog Hop


Welcome to my stop on the Be a Diamond Blog Hop inspired by Carol at Just Let Me Quilt.


If you're visiting this blog for the first time, my name is Janice, I live in a small farm town in southern Idaho and I have been quilting for 3 years now.  This blog hop actually falls only 5 days after my 3 year blog anniversary!  It has been such a fun adventure!   I really hope I meet some new QB's (quilting buddies) as a result of this hop.  I am not a teacher, designer, pattern writer, or famous in any way at all so this blog is strictly about my adventures in quilting and creating.  I hope you'll become a part of my story!

OK, I'll get to my "diamond" story.  

What would you do if you suddenly owned a BOATLOAD of pre-cut 60 degree diamonds like this?

All florals with yellow backgrounds . . 


And we're not talking just a few . . .


We're talking hundreds!


with over 30 different fabrics represented.


If you want to know the story of how and why these diamonds ended up in my hands, you can read about it here.   

After publishing that post and asking for ideas about what to do with this pile of diamonds that someone had spent a lot of time cutting, a fellow blogger suggested I should join this hop.  So I did!  I contacted Carol and she added me in.  Another blogger friend had a GREAT suggestion  to start a series of Blog posts about these diamonds and name them the Diamond Chronicles.  So I did!  Thank you, Kathy!

So the first thing was to decide what Quilt #1 in the Diamonds Chronicles was going to be.  

Tumbling blocks?

Chevrons?


Bigger diamonds?


Stars?


I decided to go with stars!  And as a result needed some more diamonds to fill in the blanks between stars.  In amongst the fabric haul I had acquired were also a variety of solids so I picked this beautiful sky blue and cut 30 more diamonds to go with my stars like this!


And here's the finished quilt top . . .


Now to decide what to use on the back and how to quilt it.  From the same haul of fabric the diamonds came with, happened to be a piece of solid pink the PERFECT size!  So pink it was.  I chose some cute pink striped fabric and cut it on the diagonal to use as binding.


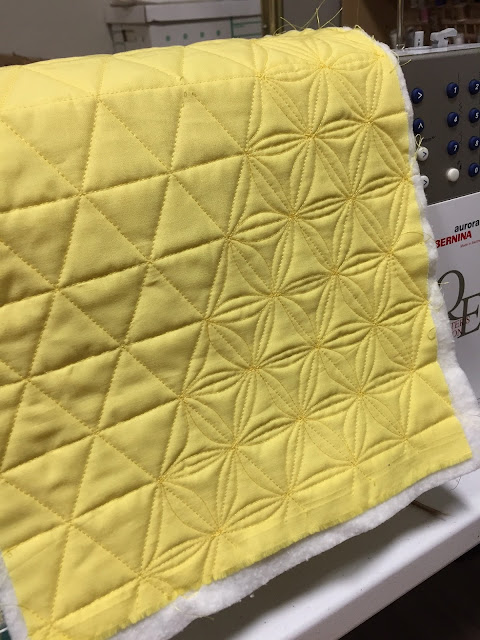
The quilting was done in a simple three way grid that I learned from watching a class by Christina Cameli called Quilting the Grid.  You can read my review of that class here.  I almost added in orange peel curves into the grid as I did in this practice piece . . .

But decided to keep it simple and stopped with just the grid.  And here is my finished baby quilt!  
It measures 46 x 44 and  will be gifted to my third granddaughter  (Nora Joy Eileen) who is due in just a few weeks!  It was a windy day and I couldn't get any decent outside pictures without them looking wonky.  Oh well.  


Here's a shot on the grass.


I'll close out my post with a shot of me and my two sweet granddaughters in their Easter dresses.


I hope you'll come visit again to see what quilt I'll make next in the Diamond Chronicles!  I've only used 60 diamonds out of over 500!

Be sure to visit the rest of the talented bloggers in the Be a Diamond Blog Hop!   


Tuesday, April 16, 2019

Diamond Chronicles Quilt Top #1 is Done!

I finished my first version of my diamond series quilt tops.  Y-seams and all!  If you're wondering what this series is all about, this post will explain what I mean by Diamond Chronicles   This quilt measures approximately 40 x 48.

I think I will use up some of the yellow diamonds to make a scrappy yellow binding.  If I had to hazard a guess as to how many diamonds I started with, I would say at least 500 plus!  This quilt only used up about 60 of them.  I am so curious as to what the seamstress who cut these out intended to do with them all.

I'll share quilt #2 in a future post and hopefully get this one quilted too!

And on to other news.  As you know, quite a large amount of the fabric I acquired in that infamous auction happened to be Civil War reproduction fabric.  I am really starting to fall in love with quilts using those fabrics.  They feel so old fashioned and homey to me.  Anyway, I am dipping my toe in the water slowly by making something small.  I signed up for a doll quilt swap put on by Lori at Humble Quilts.  You can view the last 5 years results of that event here.  Maybe you'll want to join in next year.

Need some inspiration?
Here is my creation for this year's swap.  I still need to put a label on it and get it mailed.  
I haven't yet received my swap quilt yet but I'll be sure to share when I do!

I know my latest posts haven't had a lot of modern bright colored quilts in them like I normally do but I'm still working on THIS project  . . .

I'm kind of stalled out on it and haven't completed month 3 yet and we've already been given the instructions for month 4.  I better get with it!

Oh, I also joined a group on Facebook called Stitching With Joy.  She is going to give us some hints and tips on how to get your UFO's (Unfinished Objects) organized.  I was super surprised to find out I have at least 18 UFO's and I'm pretty sure there are more that I just haven't come across yet.  I am going to start working on getting these partially done projects finished up.  I couldn't believe it but Joy says she has 185!  Which was actually less than last year's total of 216!!  Where does she put them all???  Hey, at least she is making progress and I hope to do the same.

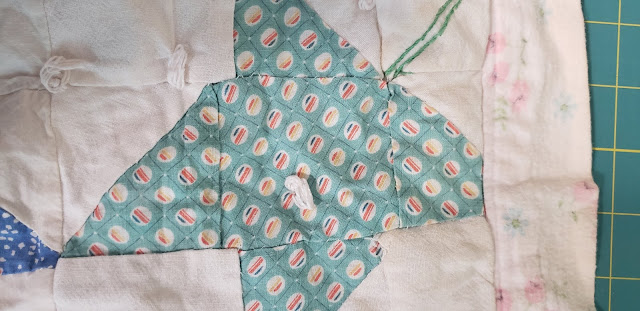
Last but not least, as I was searching through UFO's to be listed, I found this old quilt.

  It's super stained and worn out in a lot of places.   I'm not sure what to do with it.  I enjoyed studying the fabrics in it which appear to be from the 30's and 40's era?   Here are a few closeups of the fabrics . . .


The colors are amazingly bright on some of these!


Do you think my guess is about right?  
Any idea what the name of this block might be?


Linking to:

Wednesday, April 10, 2019

Tips for Sewing Y-Seams

For those of you who haven't read my last few posts, I recently stumbled across a local auction of a quilter's stash with the buy of a lifetime for yards and yards of fabric at less than a $1 per yard!  In amongst the totes of fabric were some unfinished projects by the former owner.  One of these was a huge pile of 60 degree diamonds all in yellow floral fabrics.  HUNDREDS of diamonds.

Some I think are beautiful and some are kind of blah.  Regardless, I have made the commitment to not let the effort of the quilter who cut all these diamonds go to waste!  I am going to see how many different baby quilts I can make out of these diamonds.  (yes, I am getting to the Y-seams, hang in there!)

So here is the start of my Diamond Chronicles #1!    I decided to go with star shapes for the first one.  As you can see in this picture, the fabric with stripes on it is a little larger than the rest of them so I'm going to have to be careful to measure and trim everything before I sew them together.

I decided to go with pairs so each star has three different fabrics with the matching pairs being directly across from one another.  I sewed together 8 full stars and two half stars to  be part of a baby quilt.  Amongst the stash that I purchased, I found some yardage of a solid sky blue fabric.   I cut about 30-something more diamonds out of that to go in between the stars.  Like this . . .
I am having a terrible time getting the colors to show correctly.  I'm also noticing I probably should have paid more attention to the shades of yellow I was using.  Some of them are really washed out and some are more vivid.  Not all yellows are created equal.  Well, this will be a learning journey.  I also noticed on the half star on the bottom, the two repeated fabrics are not across from each other as they should be.   Maybe I'll do better on the next one.

  Yes, this pattern means LOTS of Y-seams!  I am plunging in and this will be a perfect practice quilt for that particular method.  I'm pretty happy with how most of the Y-seams are turning out.  There are a few less than desirable but we won't talk about those and press on!  I'll show you the ones I'm excited about!


And here we have three rows of stars hanging on the ironing board and ready to be sewn together.  This will be the true challenge! Not just Y-seams, but inverted Y-seams!   I've watched several tutorials about this and here are the two things that have helped me out the most.  

1.  Before you begin, it is best to mark a 1/4 inch line on the back of all the diamonds on every single side.  (this is not to scale)


2.  As you are sewing the diamonds together, always begin and end 1/4 inch from the edge of the diamond where the 1/4 inch lines that you drew cross each other and make an "X".  You will find this will save you much seam ripping and gnashing of teeth.  

Now these are just tips, you may want to go find a full blown video tutorial to see the entire process but if I can do it (I consider myself somewhere in the range of beginner to intermediate quilter) YOU CAN TOO!

So that is my first installment of the Diamond Chronicles.  My goal is to have this top finished within a week so I can show you that and what I plan to do for Diamond Chronicles Episode #2.

I got some great ideas from you fellow blog readers out there!  If you want to see the ideas that were mentioned, you can read the comments on this post.

I'd love to hear some more diamond ideas if you have them!

Linking to: